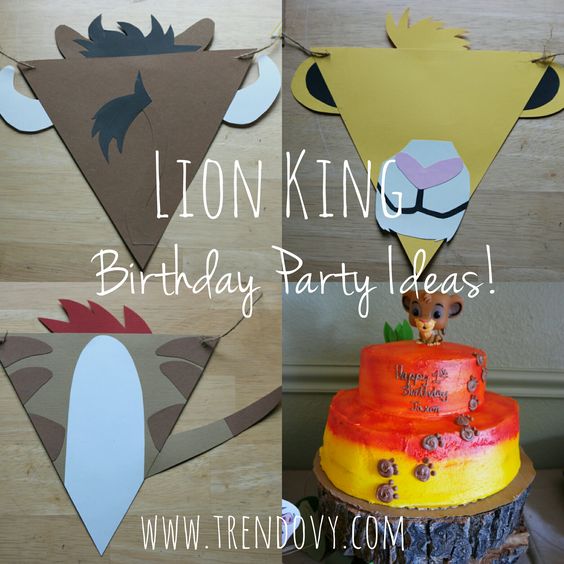
My baby boy just turned O-N-E! And it has been the year of Hakuna Matata! I might as well say all things Lion King are his jam! When Jax turned 8 months old I knew I had to throw him a Lion King party for his first birthday. To my surprise there really wasn’t much out there in terms of Lion King decorations or Lion King party ideas. Even on Pinterest there wasn’t much Lion King Party ideas, sure there was Lion Guard (the latest craze) and Safari parties but my baby doesn’t want Lion Guard or a Safari Party. He wants the Lion King! And gosh darn it. My baby is gonna get a Lion King Party!
Not that Jax really demanded a Lion King party at the ripe age of one. But you get the idea. When mamma has her mindset on a theme, by gully, mamma’s gonna do what she can to get it done. So, I devoured all things Lion King, Lion Guard, Lions, and Jungle themes on Pinterest to spark some inspiration. I am a DIY type of girl and made all the decorations myself. I started making the decorations slowly over a 2-3 month period. I didn’t want to bust my butt crafting at the last minute.
In this post, I”ll share how I threw an amazing Lion King themed party for my son’s first birthday. I’ll break down my process and explain the techniques I used to create the decorations, games, party flavors, etc.
Simba Painting:

This was the first Lion King project I started. I found an old piece of heavy duty chipboard that was in our garage that was the perfect size. I’m not going to go into super detail on how I made this but I will give you a brief synopsis of my process. I did not buy anything to make this. I used stuff I already had. So please search your house for supplies and don’t spend tons of money making this.
Step 1: Paint the chipboard white. (You can buy a canvas too, but I am all about using what you already have and not spending tons of money on new art supplies…that being said, I am a craft and art supplies hoarder so I have tons of art supplies already). You can also just use white poster board. But that isn’t as sturdy and will get flimsy after painting it.
Step 2: Cover the WET white painted chipboard with plastic, bunching it up in areas. You can use white kitchen garbage bags to do this. This will create a cool, textured background. Leave the plastic and let it dry overnight.
Step 3: Use light blue spray ink and stencils to create a cool design on top of the white background. You can make your own spray inks too. That’s what I do. Youtube has great tutorials on how to make your own spray inks using water and food coloring or water, rubbing alcohol and acrylic paint. Check it out.
Step 4: Create a large Simba stencil out of cardboard. I printed a smaller image off the internet to use as a reference. I made a grid on the cardboard and free-handed the design to create the stencil.

Step 5: Spray paint the design on the canvas. I used a mixture of yellow, pink, and red spray paint (that’s what I had at home already) to create the Lion. I layered the yellow spray paint on top of the pink and red spray paint to create different shades of orange.
Step 6: Add purple drips using watered down acrylic paint.
Step 7: Add orange and white paint splatters on top of the Simba image.
DIY Jungle Vines:
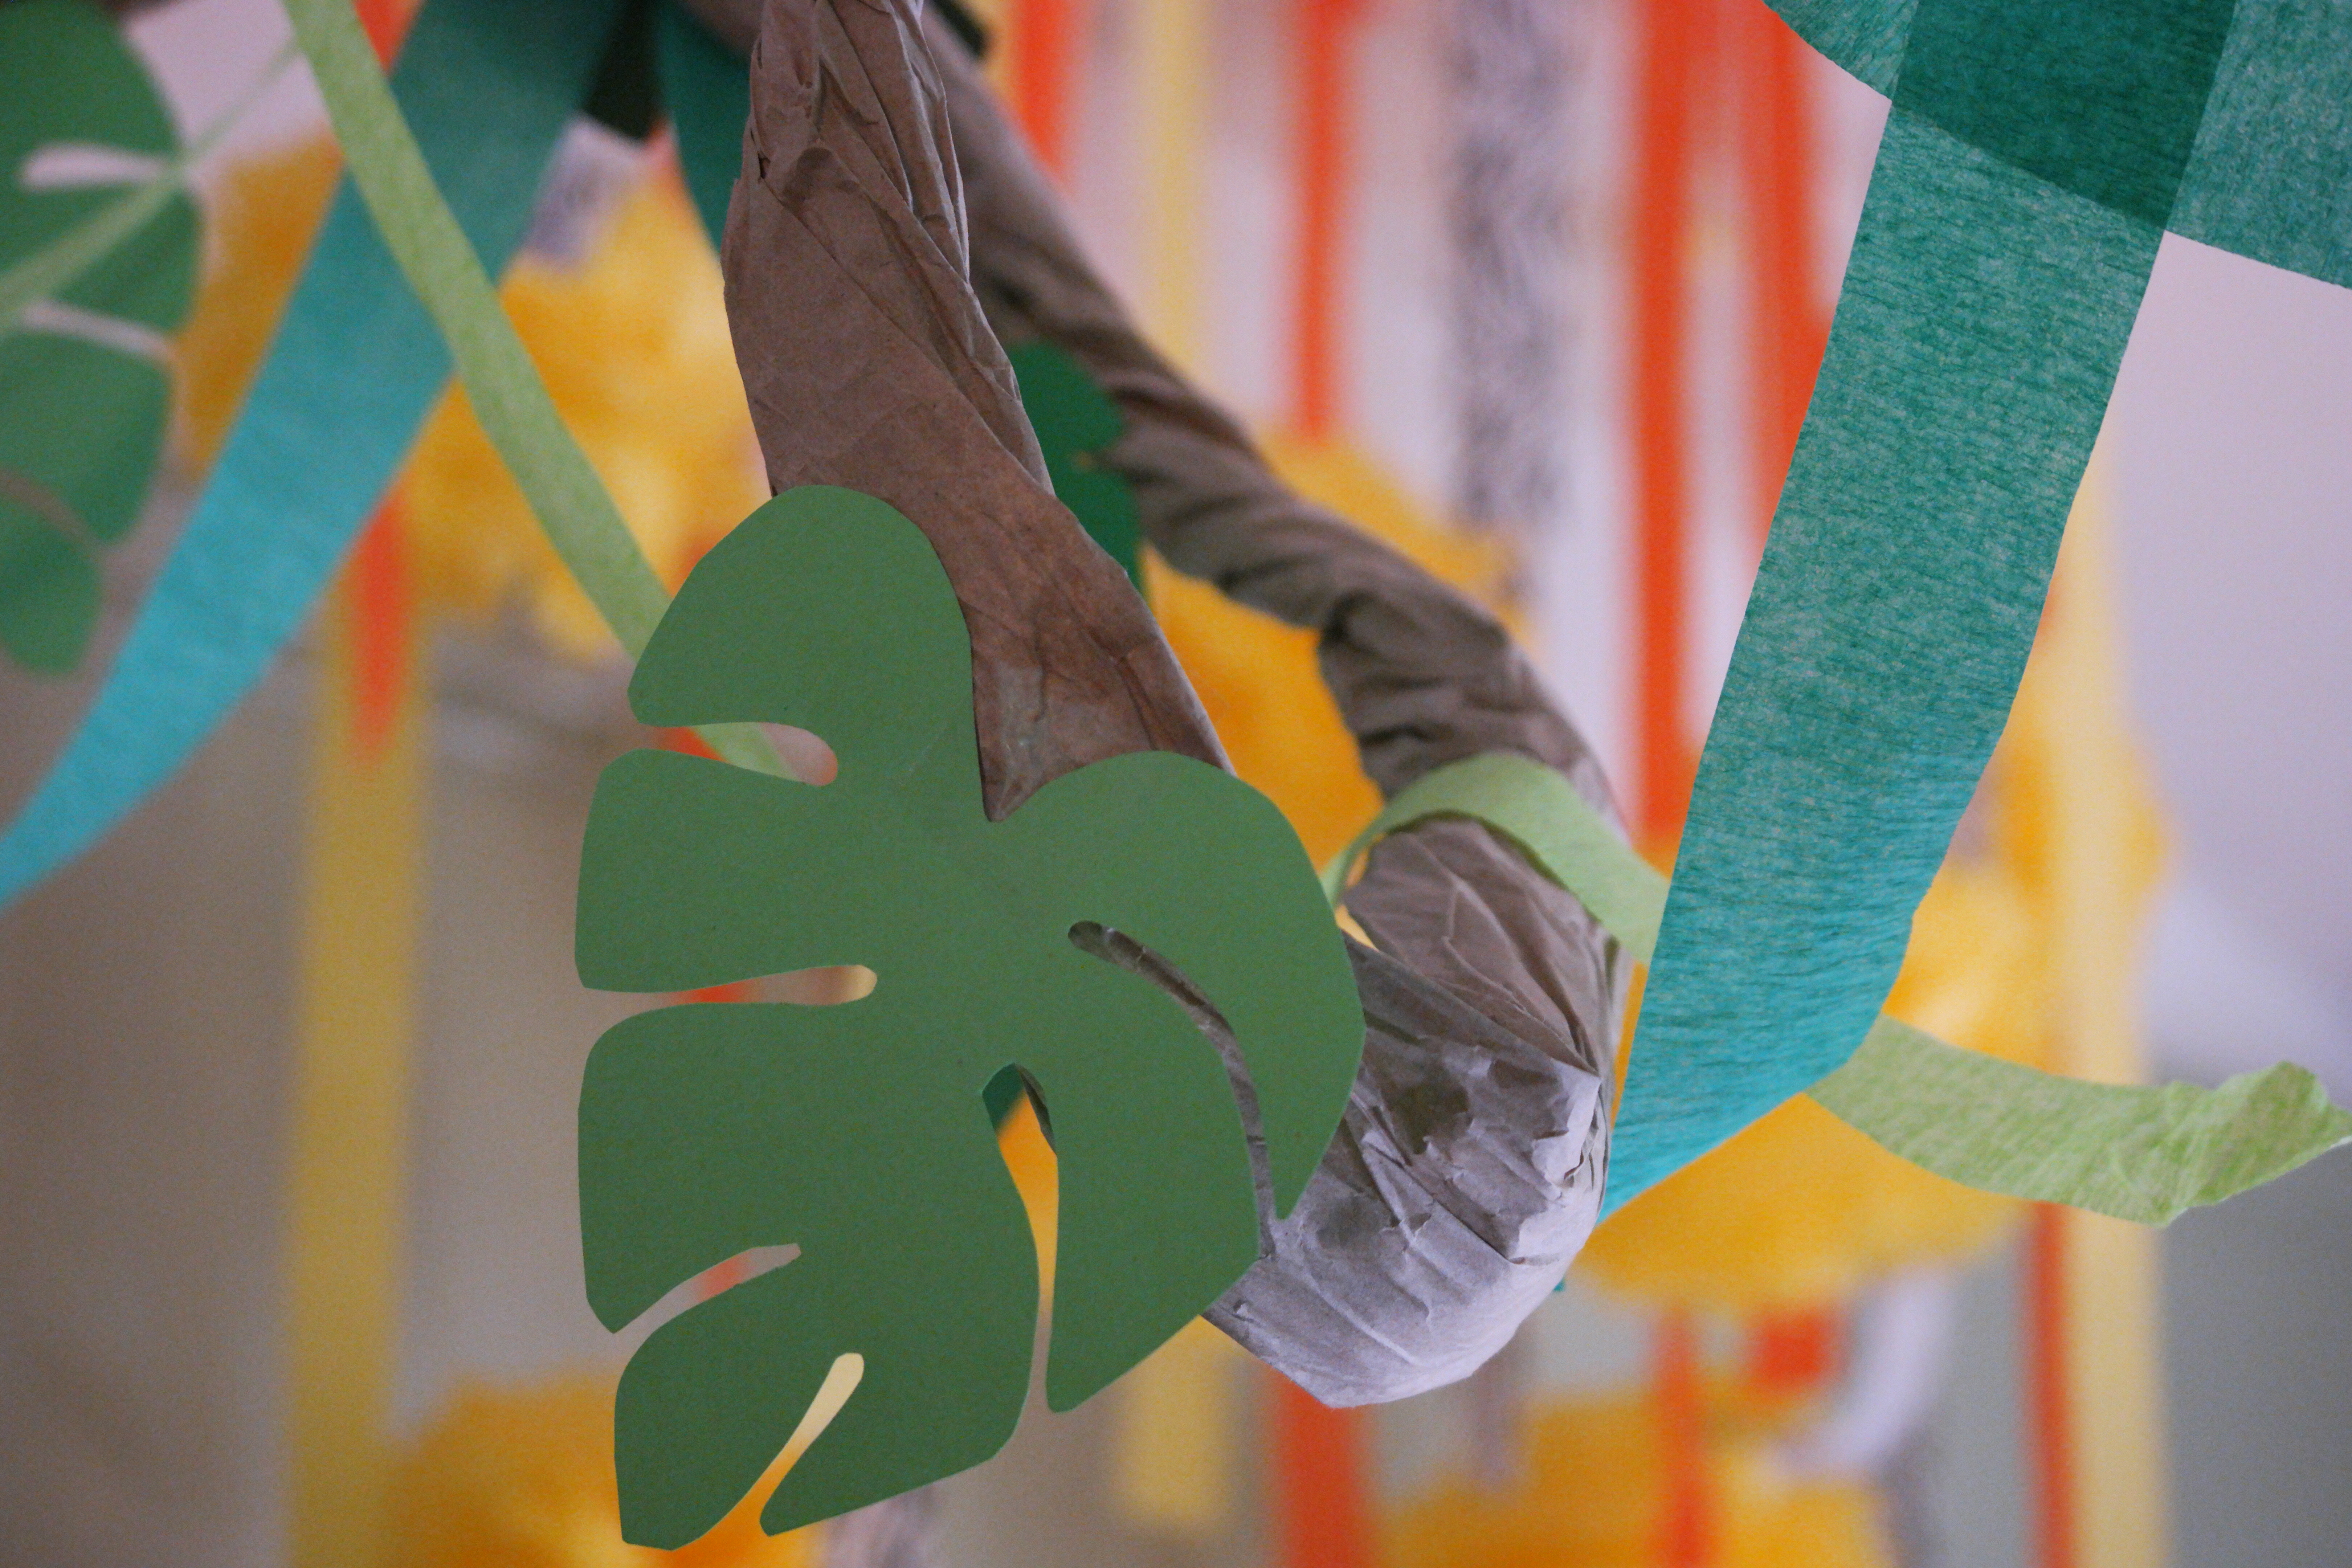
I found this idea on Pinterest. I used three different leaf templates to create my leaves. I resized my leaves to a size I liked. I printed the designs on white card stock to create the templates. I traced around the leaf template on an assortment of green card stock. Then cut out the designs. I did this slowly over a two month time frame. Doing a little here and a little there so I wouldn’t have so much to do the last week leading up to the party. I bought brown mailing paper from the Dollar Tree to create the brown vines. I also used light and dark green streamers.
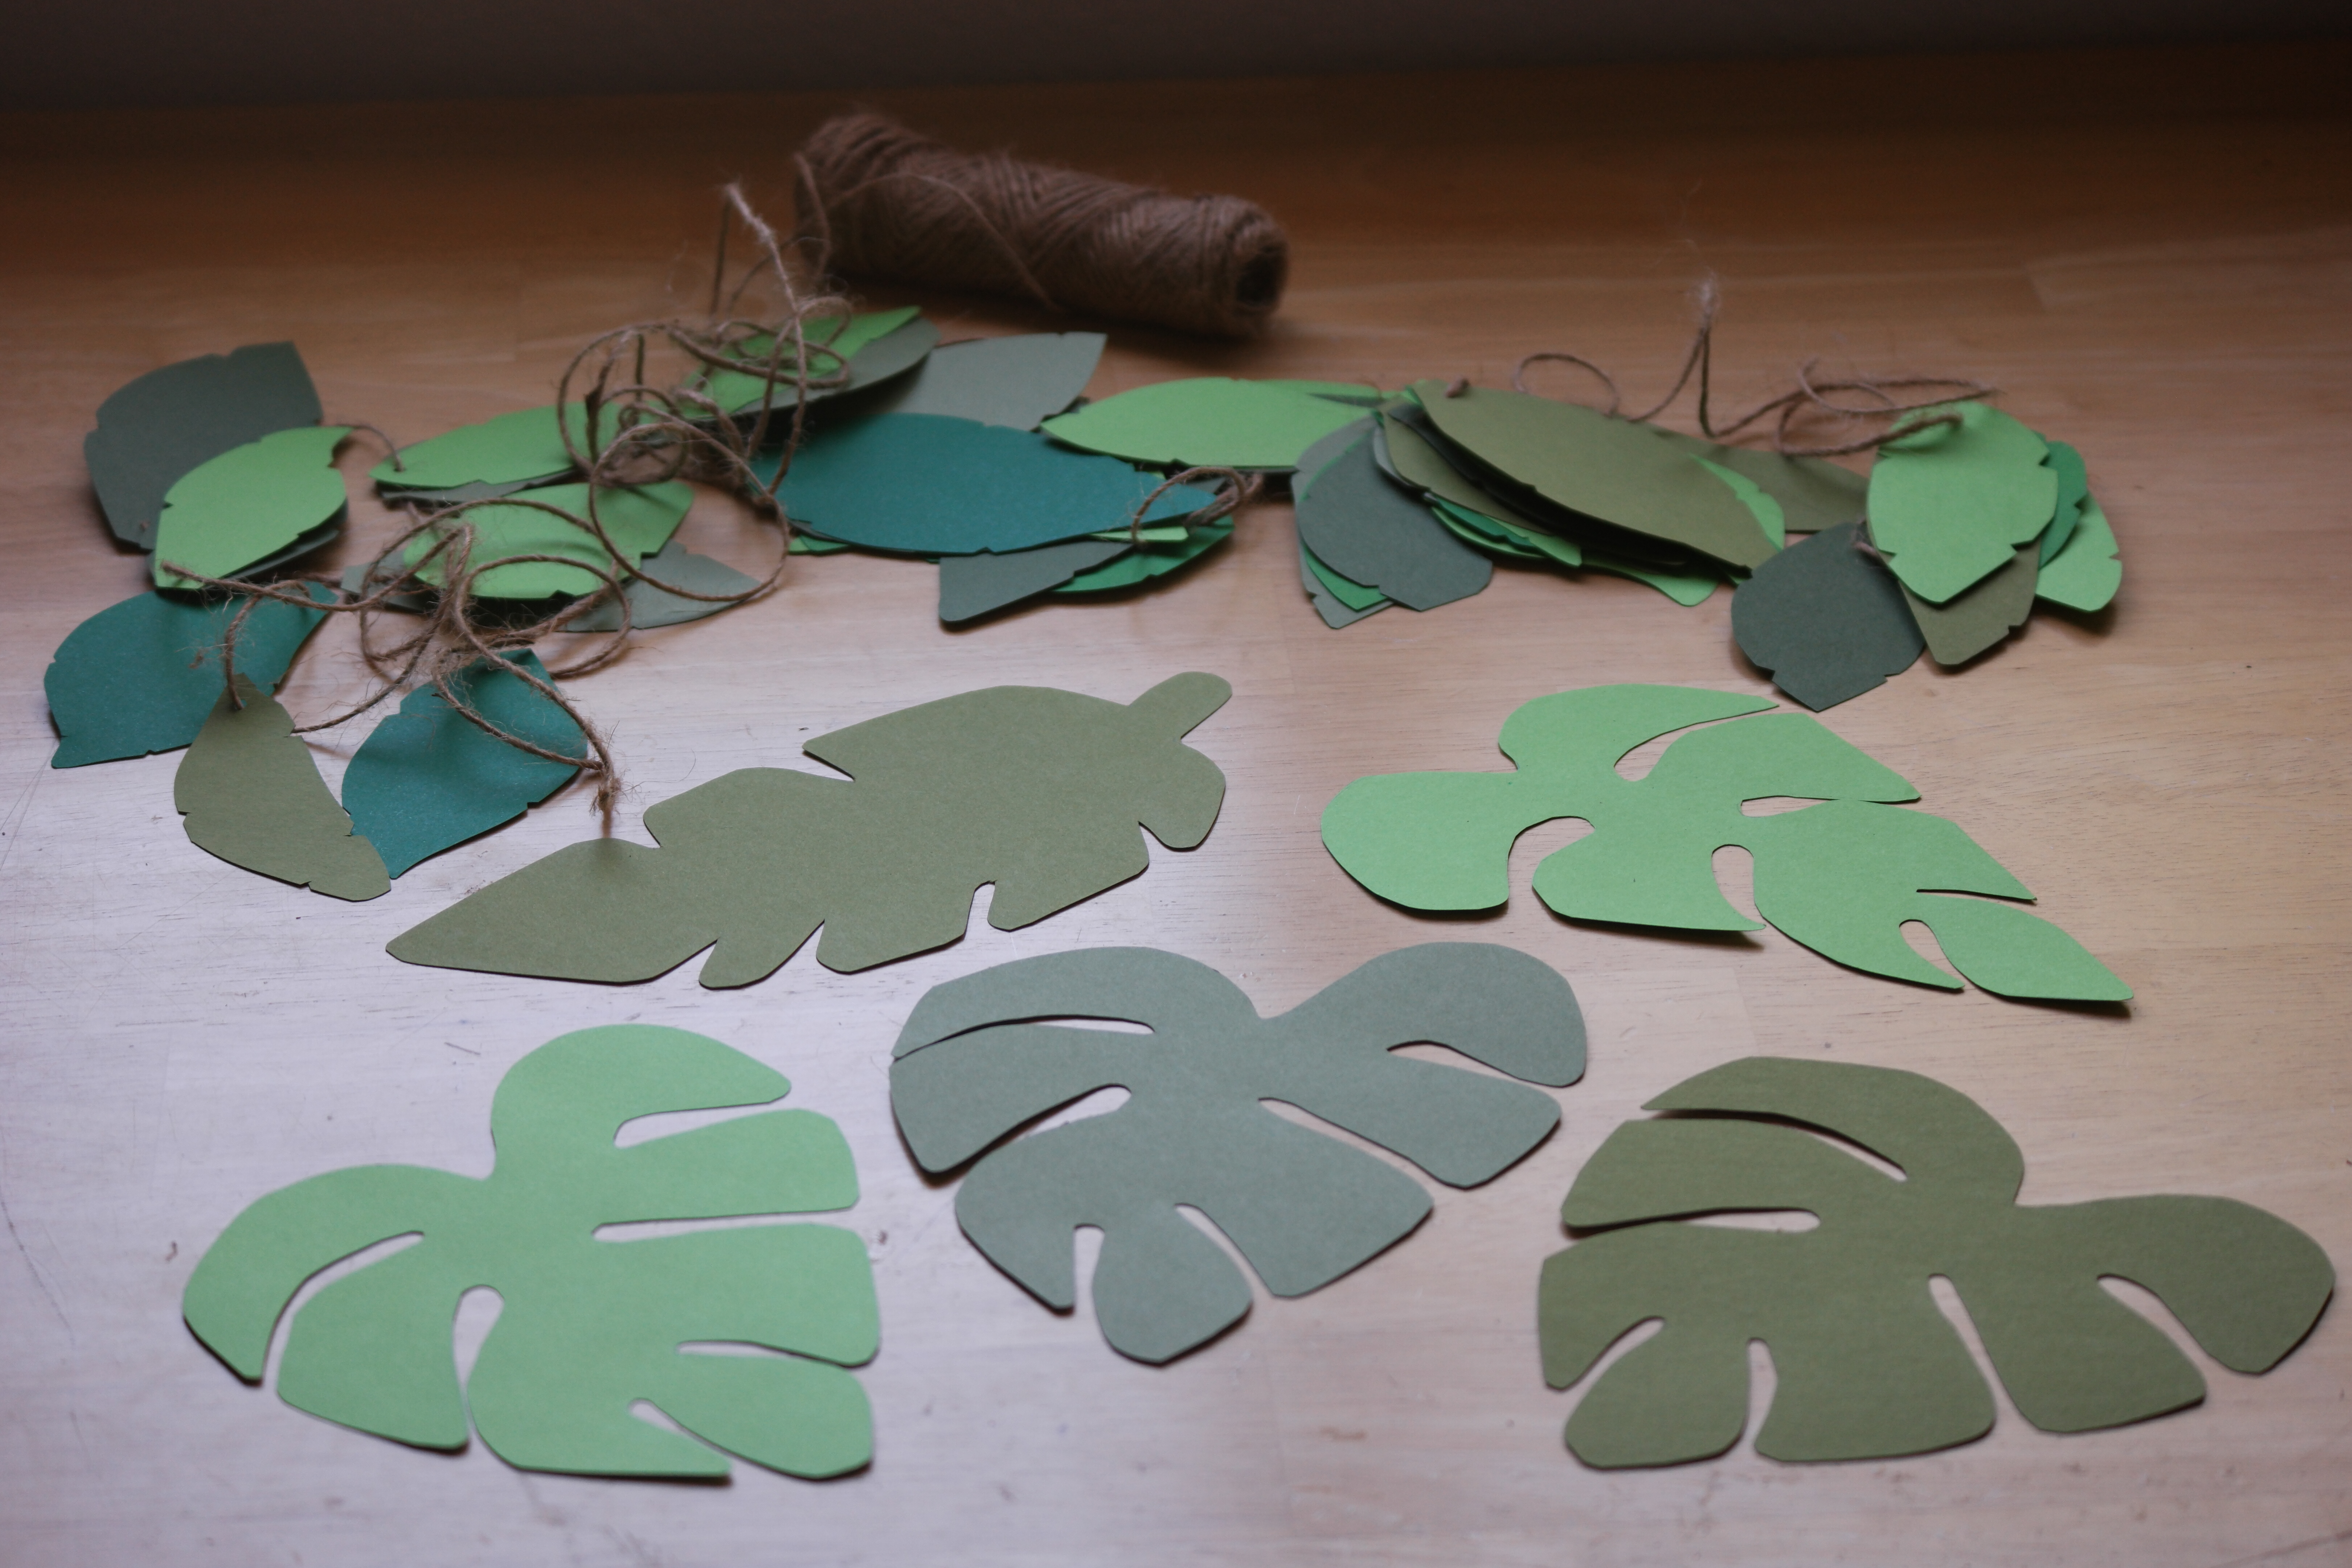
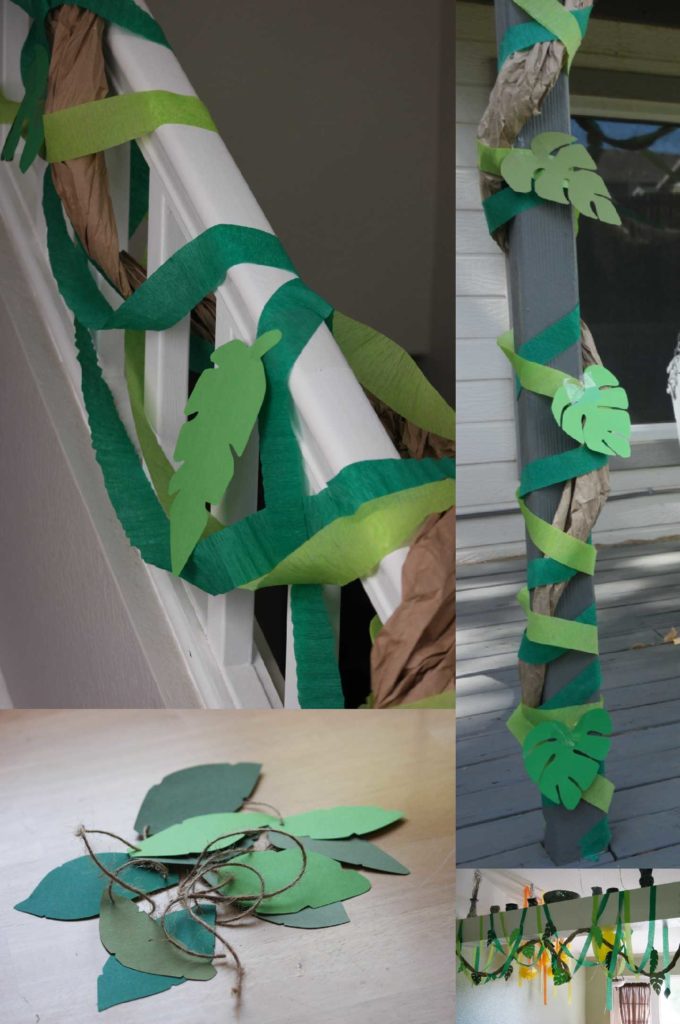
Table Decorations:

I printed the Lion King characters onto white card stock and taped the back of them to wooden nail sticks. I drilled a hole in the center of the wooden circles so the wooden nail sticks would fit snug. I cut the tips of the nail stick flush to the circle and cut varying lengths. I added raffia bows to the stick for that finished look.


The Banner:

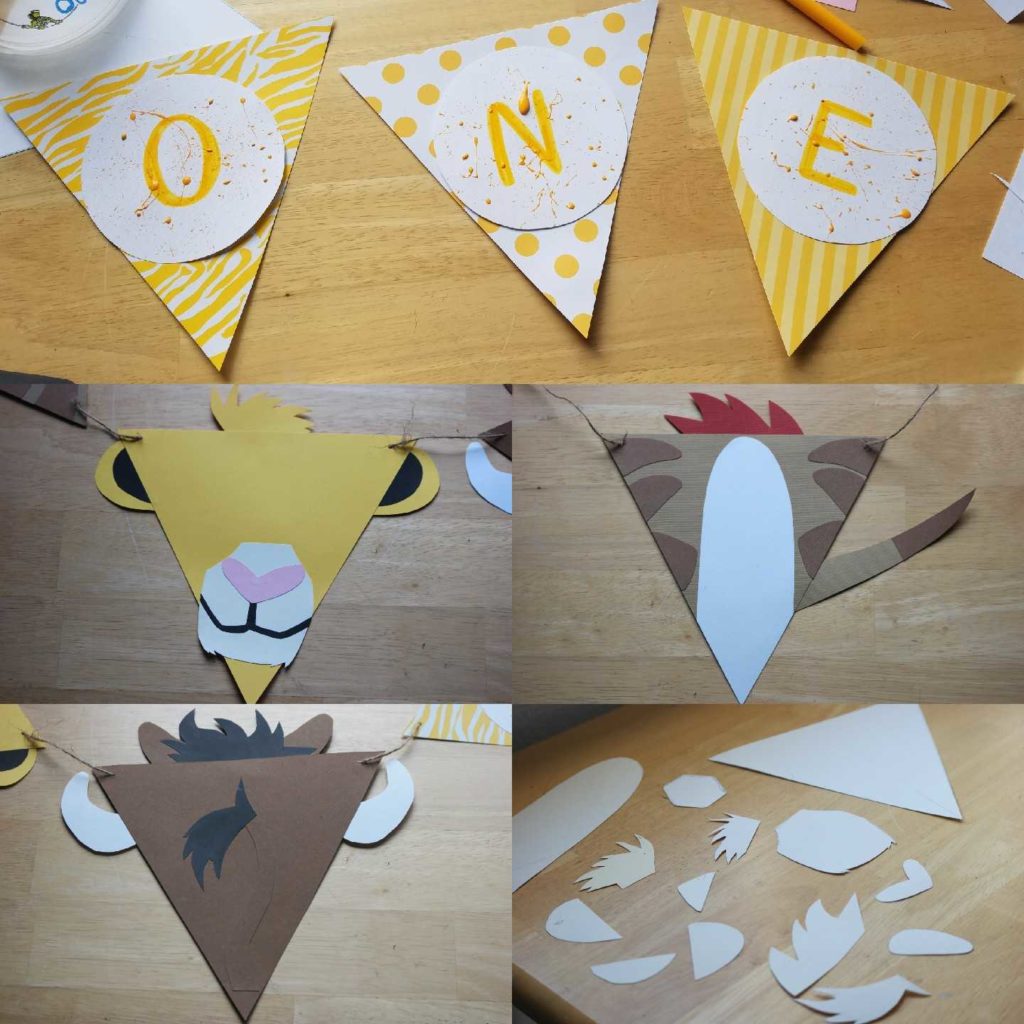
I found the inspiration for the Simba, Timon, and Pumba banner on Pinterest (the seller of these isn’t selling them anymore, but I do want to give her credit because I totally copied her idea). I handmade each one of these banners. I created my own template by free-handing each element of the character onto white card stock. Then I traced it onto the appropriate card stock color. For the Timon on the far left I glued the tail the opposite way. I laced the banner with twine.
The Mini Birthday Crown:
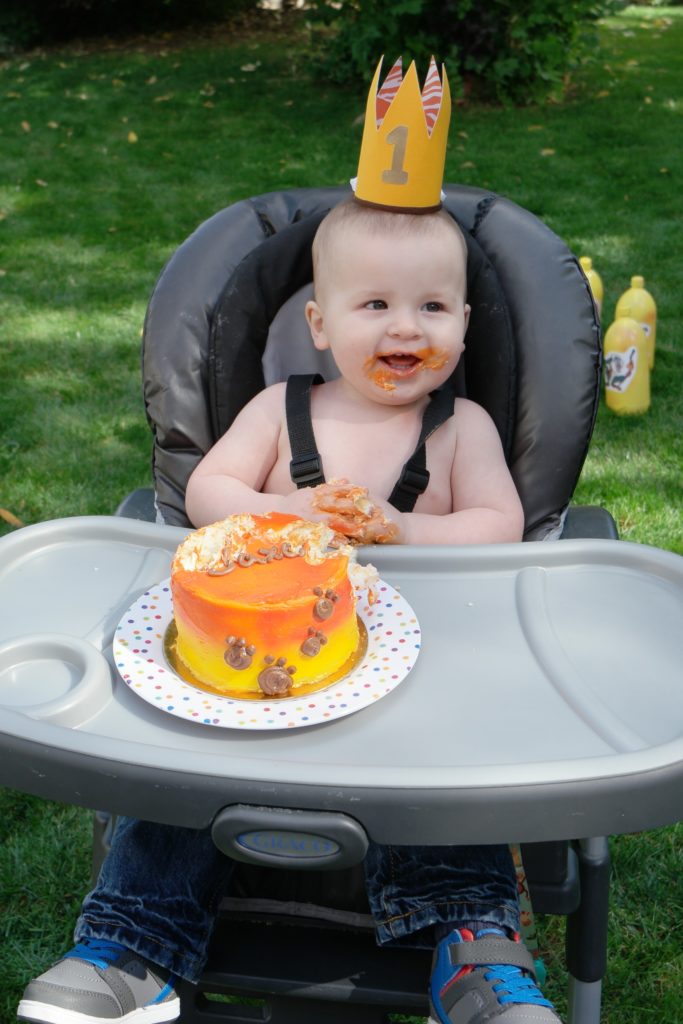
I found this mini-crown template online and adjusted the size a smidge. I used card stock and leather and added an elastic strap to complete the crown. Jax did not like the elastic strap so we just placed it on his head, luckily it stayed on! 🙂
The Activities:
-
Lion King 2 Liter Ring Toss
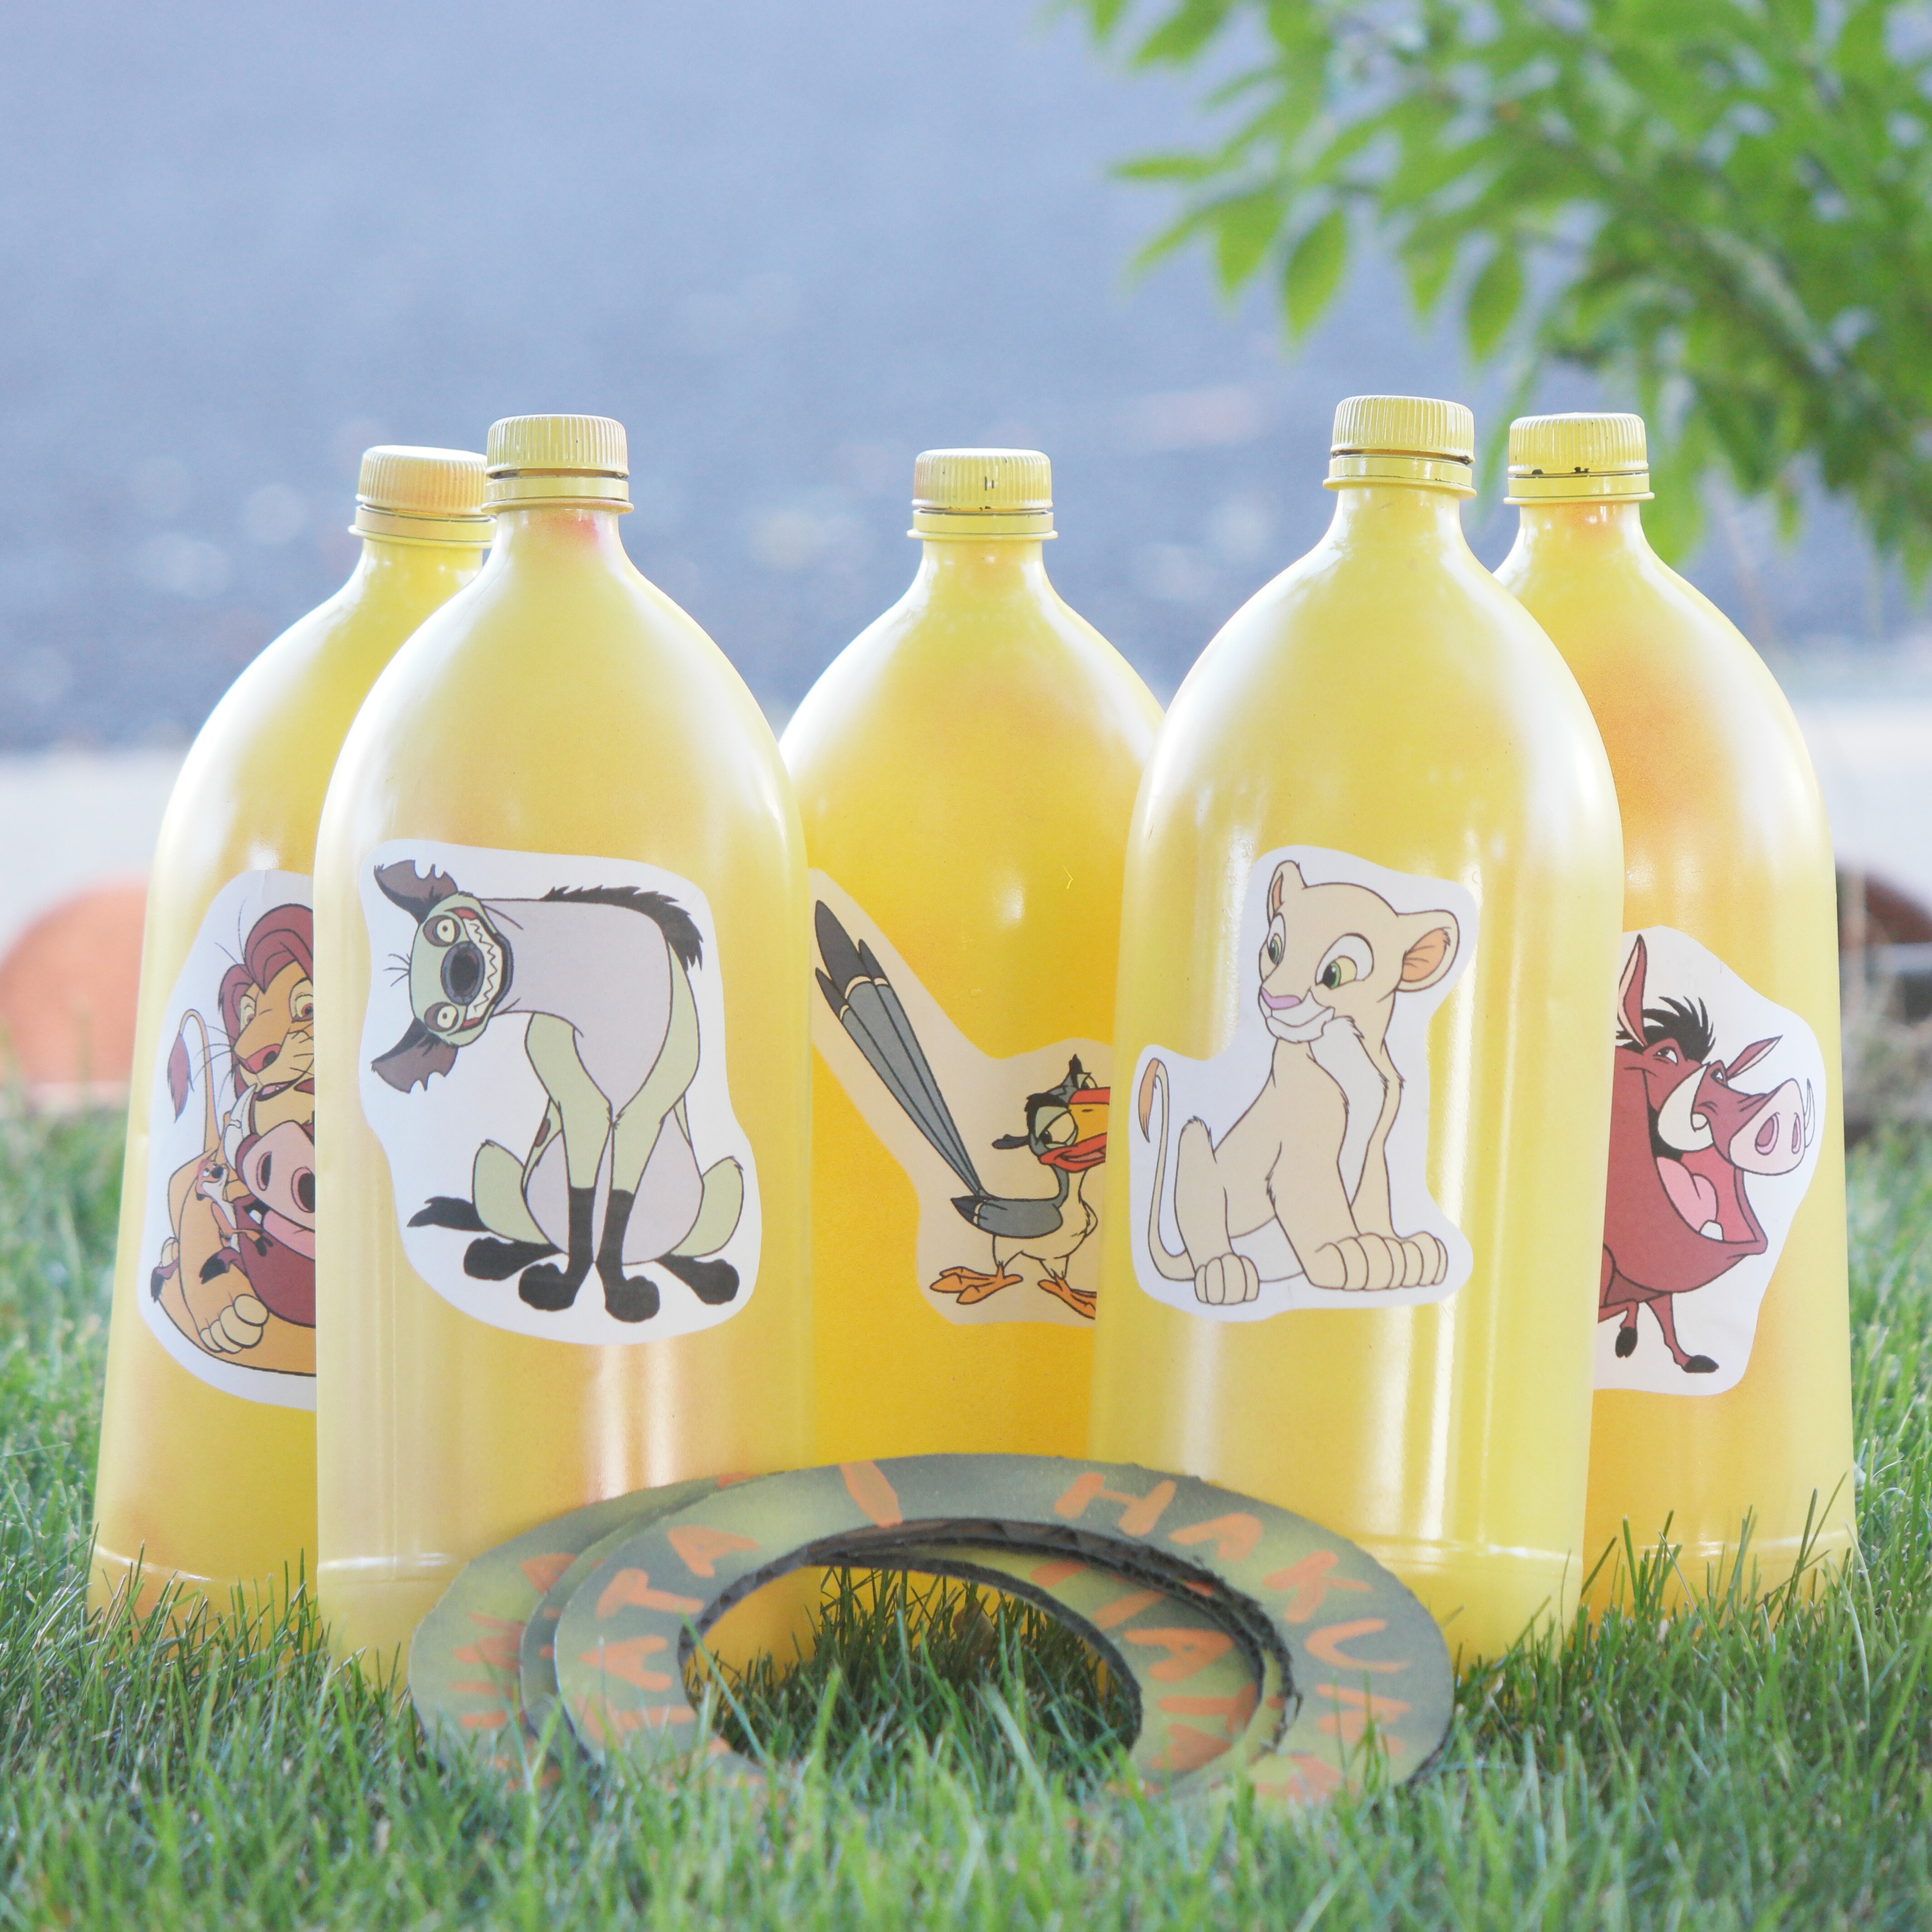
I used ten 2- Liter bottles. I filled them with about 2-3 cups of water to weigh them down. Then I painted the bottles with yellow spray paint and a light mist of red spray paint. I found some pictures online of the Lion King characters, adjusted the size so they’d be roughly the same size, and glued them on the 2- Liter bottles using a glue stick.

I made the rings using cardboard. I made six rings total because I set up two groups of five 2-Liter bottles for the party so that more kiddos could play at once. Each game had three rings. To make the rings, I traced around a bowl to get the inner circle and free-handed a parallel circle. I used an X-Acto knife to cut the rings out. My rings aren’t cut perfect but it doesn’t bother me. I spray painted both sides with a grey primer paint (I already had this spray paint that’s why I used the grey) then I added splashes of yellow spray paint. I used orange craft paint and wrote “Hakuna Matata” on the rings.
I debated between ring toss or coconut bowling. Either one would be fun. In the end, I went with ring toss because I didn’t want to worry about someone getting hit with a coconut or it breaking and denting the 2- Liter bottles. You really could make this game with any party theme. All you need to do is change the color scheme and print off the appropriate characters.
-
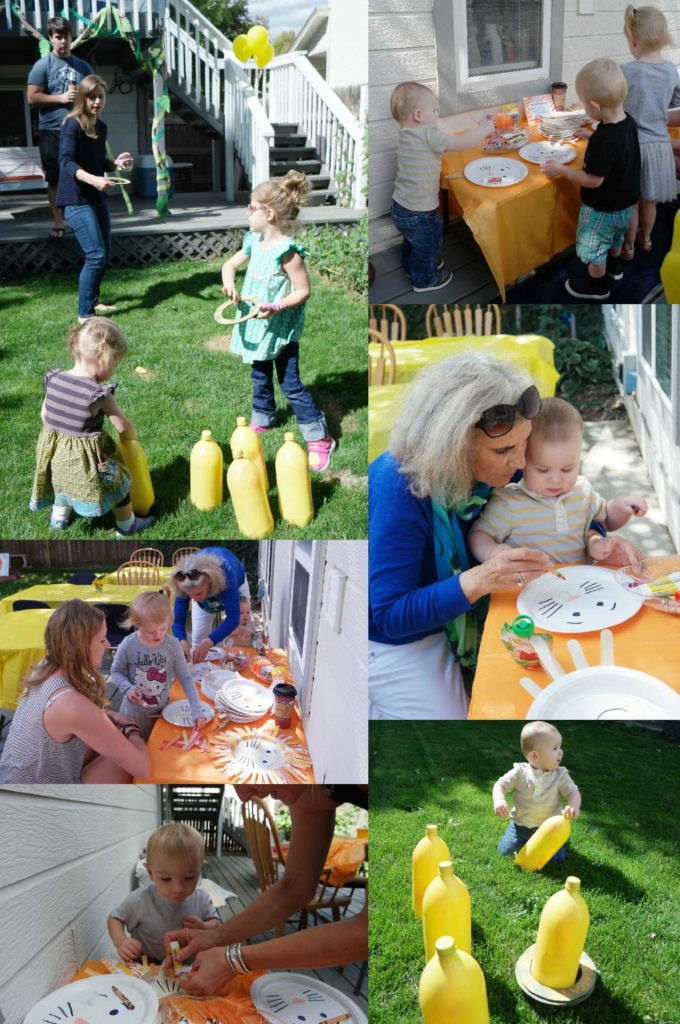
Lion Mask Craft

Cute Sign: Make a cute sign for the craft table. I downloaded a new font and the Lion King images from dafont.com. I folded a piece of 8.5 x 11 inch scrapbook paper in half and glued my label on the paper using a glue stick. Make sure the paper is card stock or glue your scrapbook paper to white card stock using a glue stick to make it more sturdy.

Cut colorful scraps: I stuck with the yellow, orange, red color palette for the lions mane. I used different decorative scissors to cut the strips. I didn’t really worry about making each size the same. They are probably roughly 4 inches long.

Lion Mask Example: I made an example of how to make the lion mask using the colorful strips.
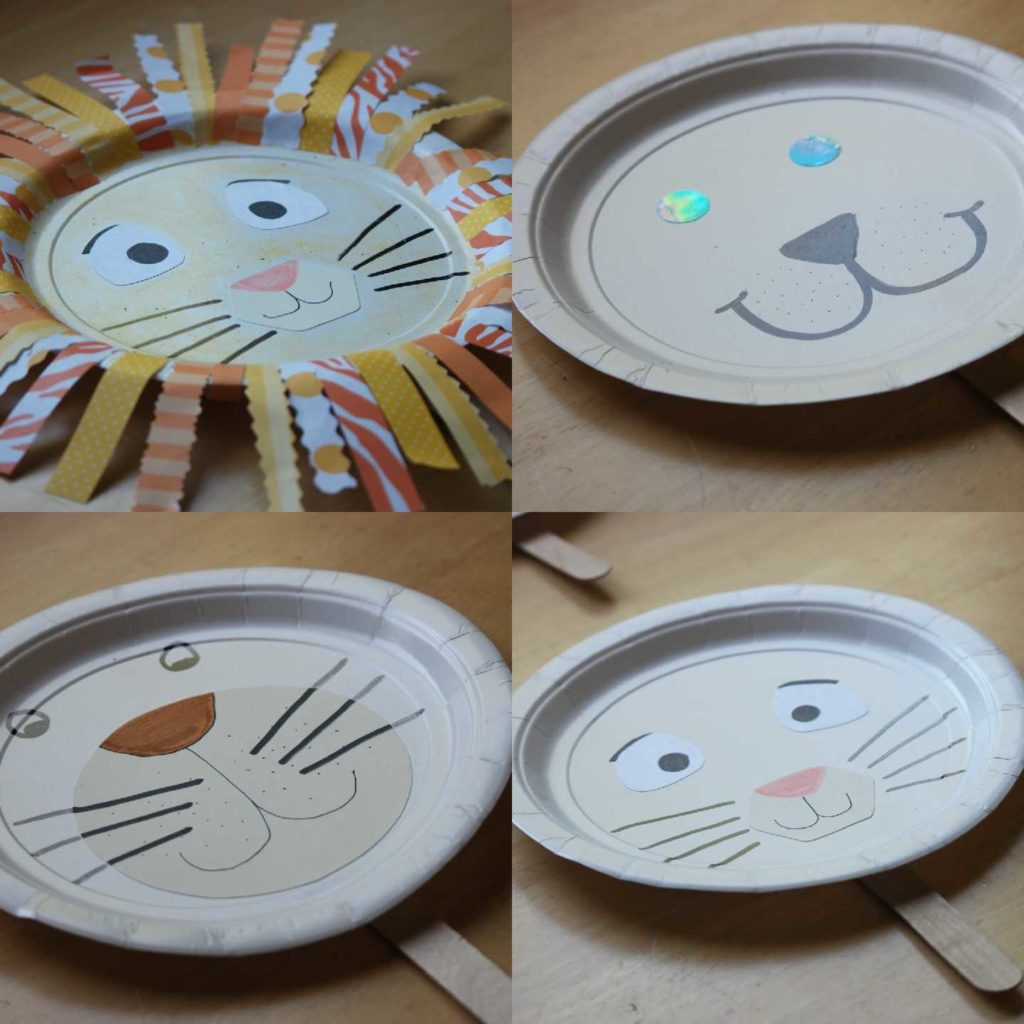
Pre-Made Lion Plate Masks without the Mane: I made three different lion masks for the kiddos to choose from. You really don’t need to make that many. You can stick with one design if you want. Glue a thick Popsicle stick on the back of the paper plates (I used contact cement). I bought my plates and Popsicle sticks at the Dollar Store.
Make sure to add some glue sticks and color crayons when setting up your craft table.
The Cake, Cupcakes & Smash cake:
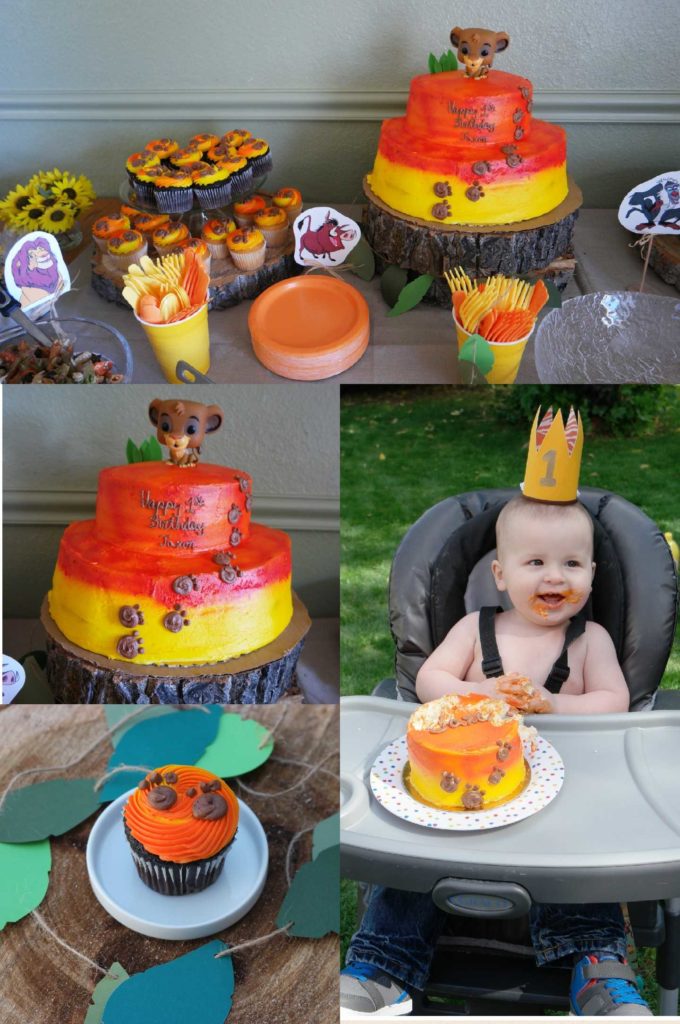
I bought a Simba Toy off Amazon to use as a cake topper. The bakery did the rest. I wanted a yellow and orange color scheme with brown foot prints. I used wooden log slabs that my dad cut for me when I visited him in Montana during the summer as the cake and cupcake holder. I think the wooden log slabs add a nice touch. Maybe you know someone who has a lot of trees and a chainsaw that will be willing to cut you some too. If not, you can always buy some!
Signature Drink:
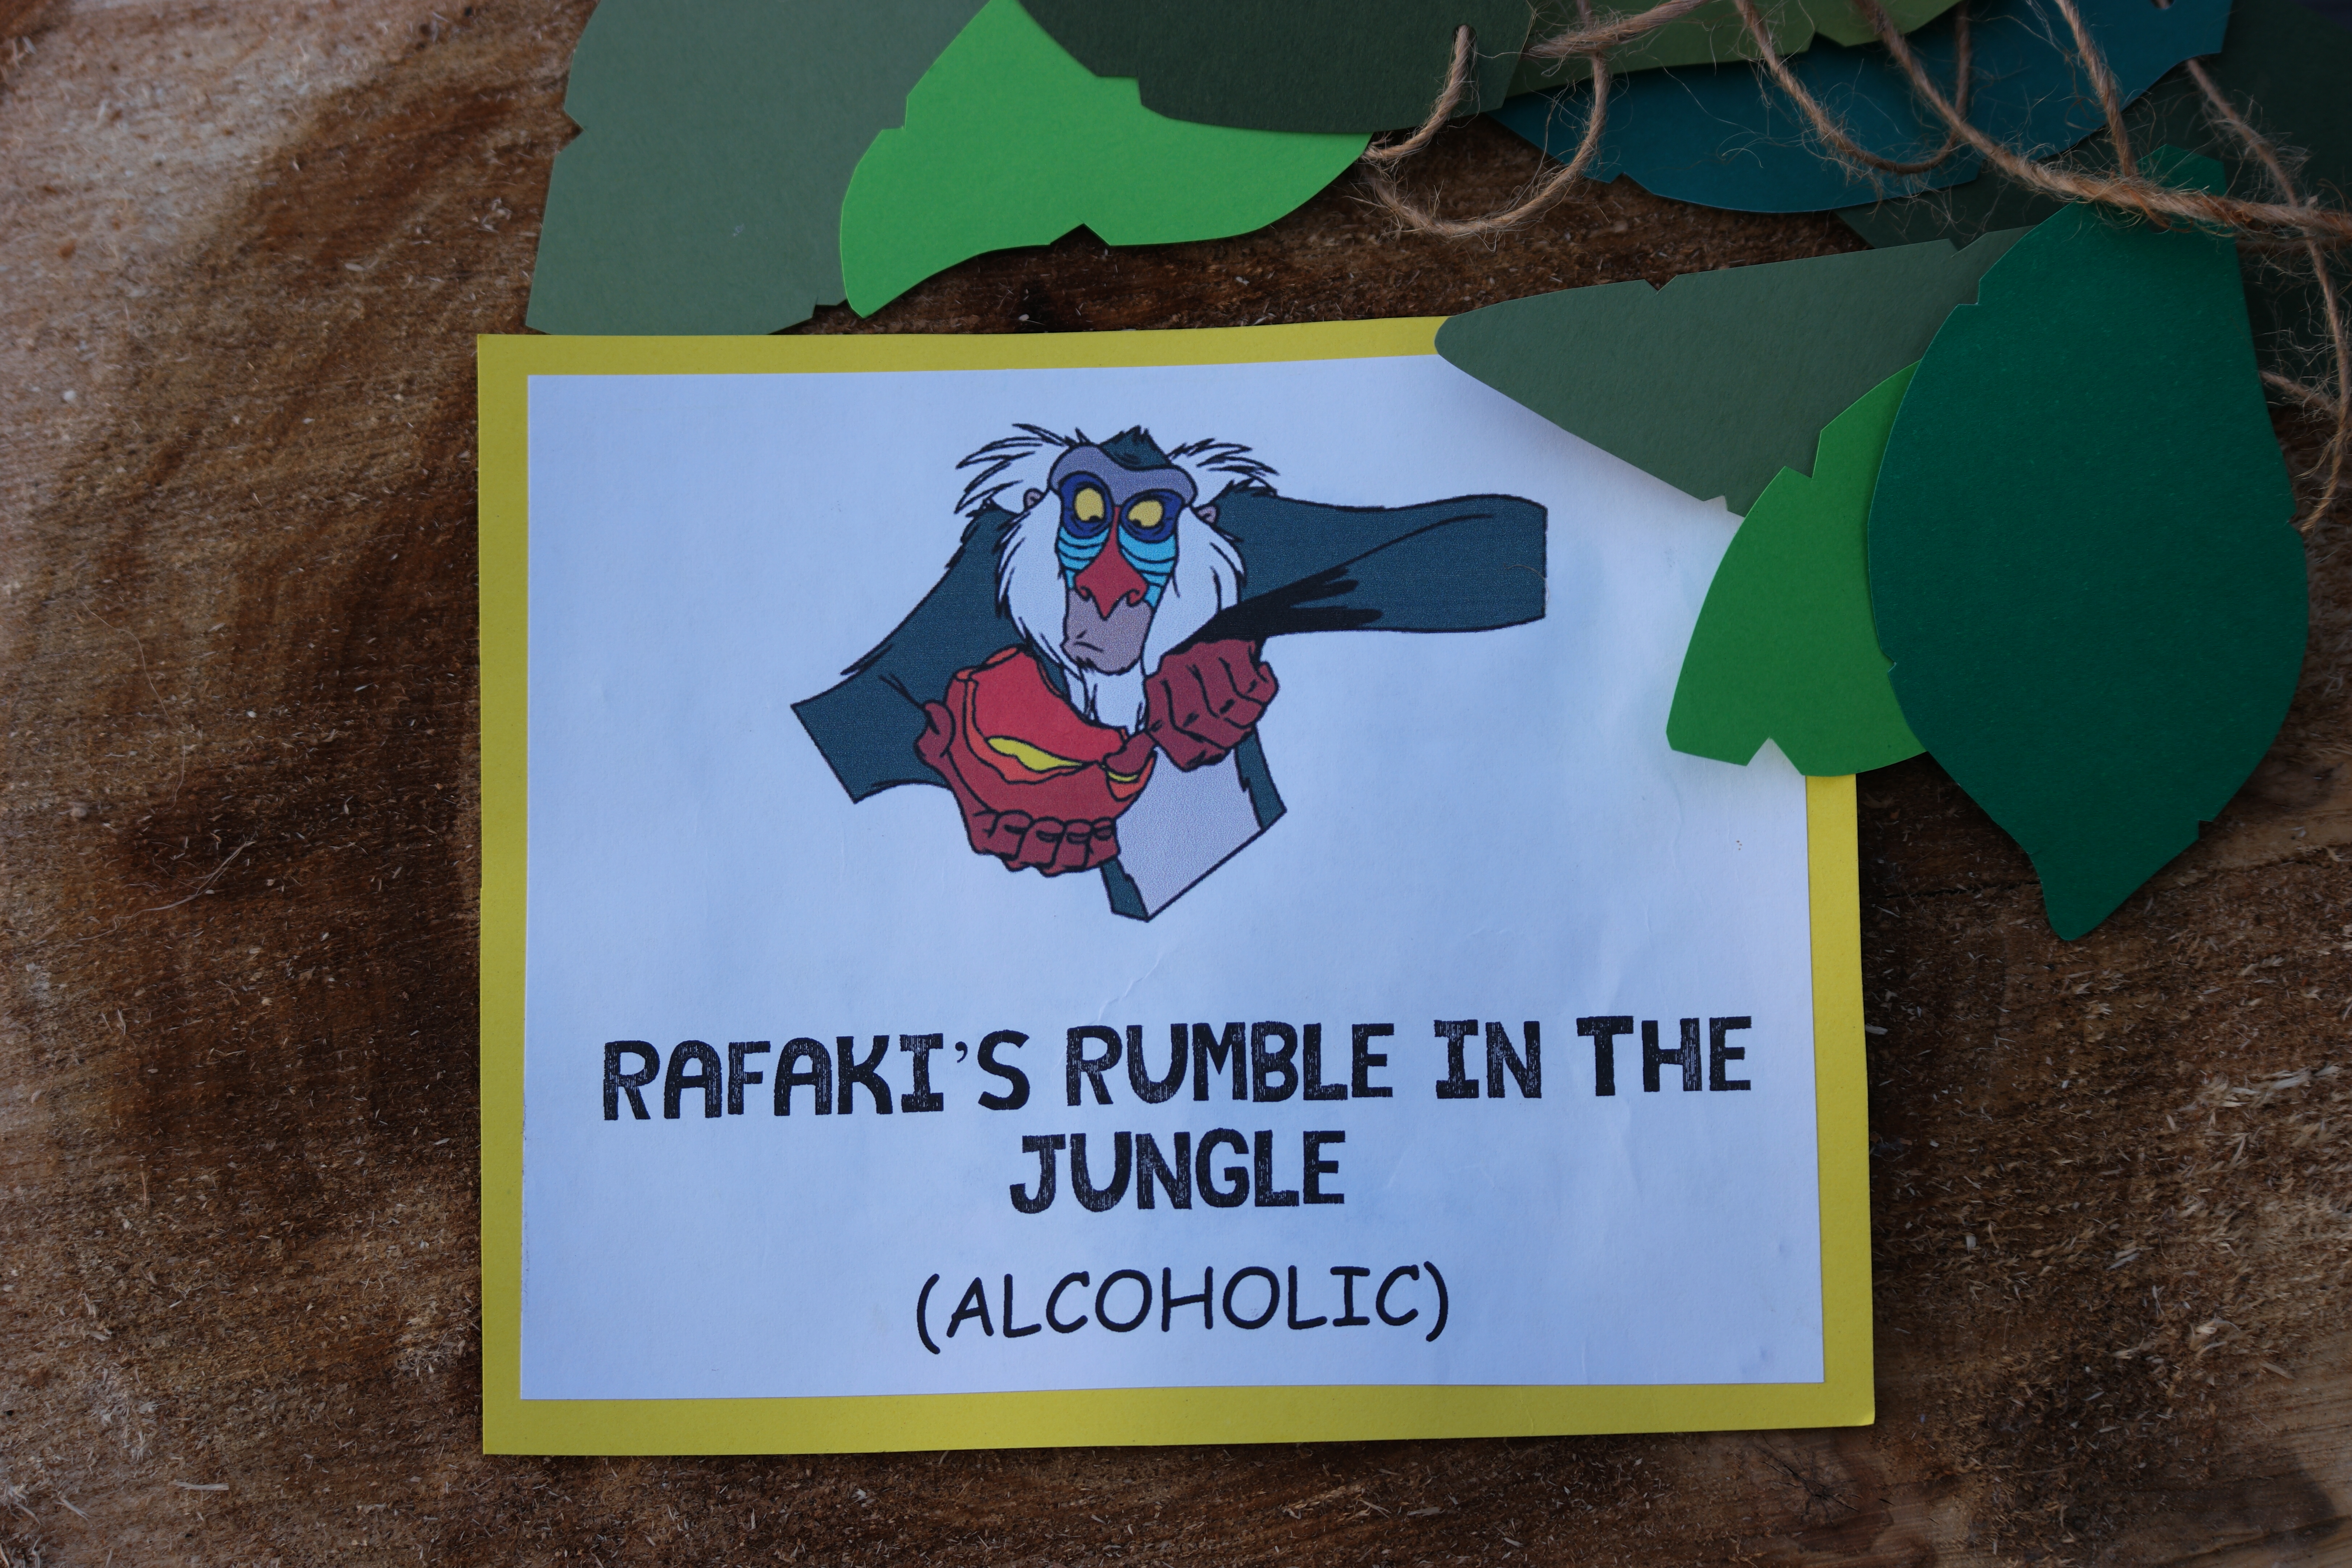
Every party needs a signature drink! I found this party punch on Pinterest. It is amazing! Lemonade, orange juice, cranberry juice, Sprite, vodka…Yum! Here is the exact recipe for the drink. I labeled the signature drink “Rafaki’s Rumble in the Jungle (alcoholic)” so that everyone knew it had alcohol in it. I didn’t manage to take a picture of the drink from the party but I put the punch in a drink dispenser with spigot and taped the label onto the container. The guys of course had beer. The kiddos had apple juice boxes. And we also had Soda for the non-drinkers.
Party Favors:
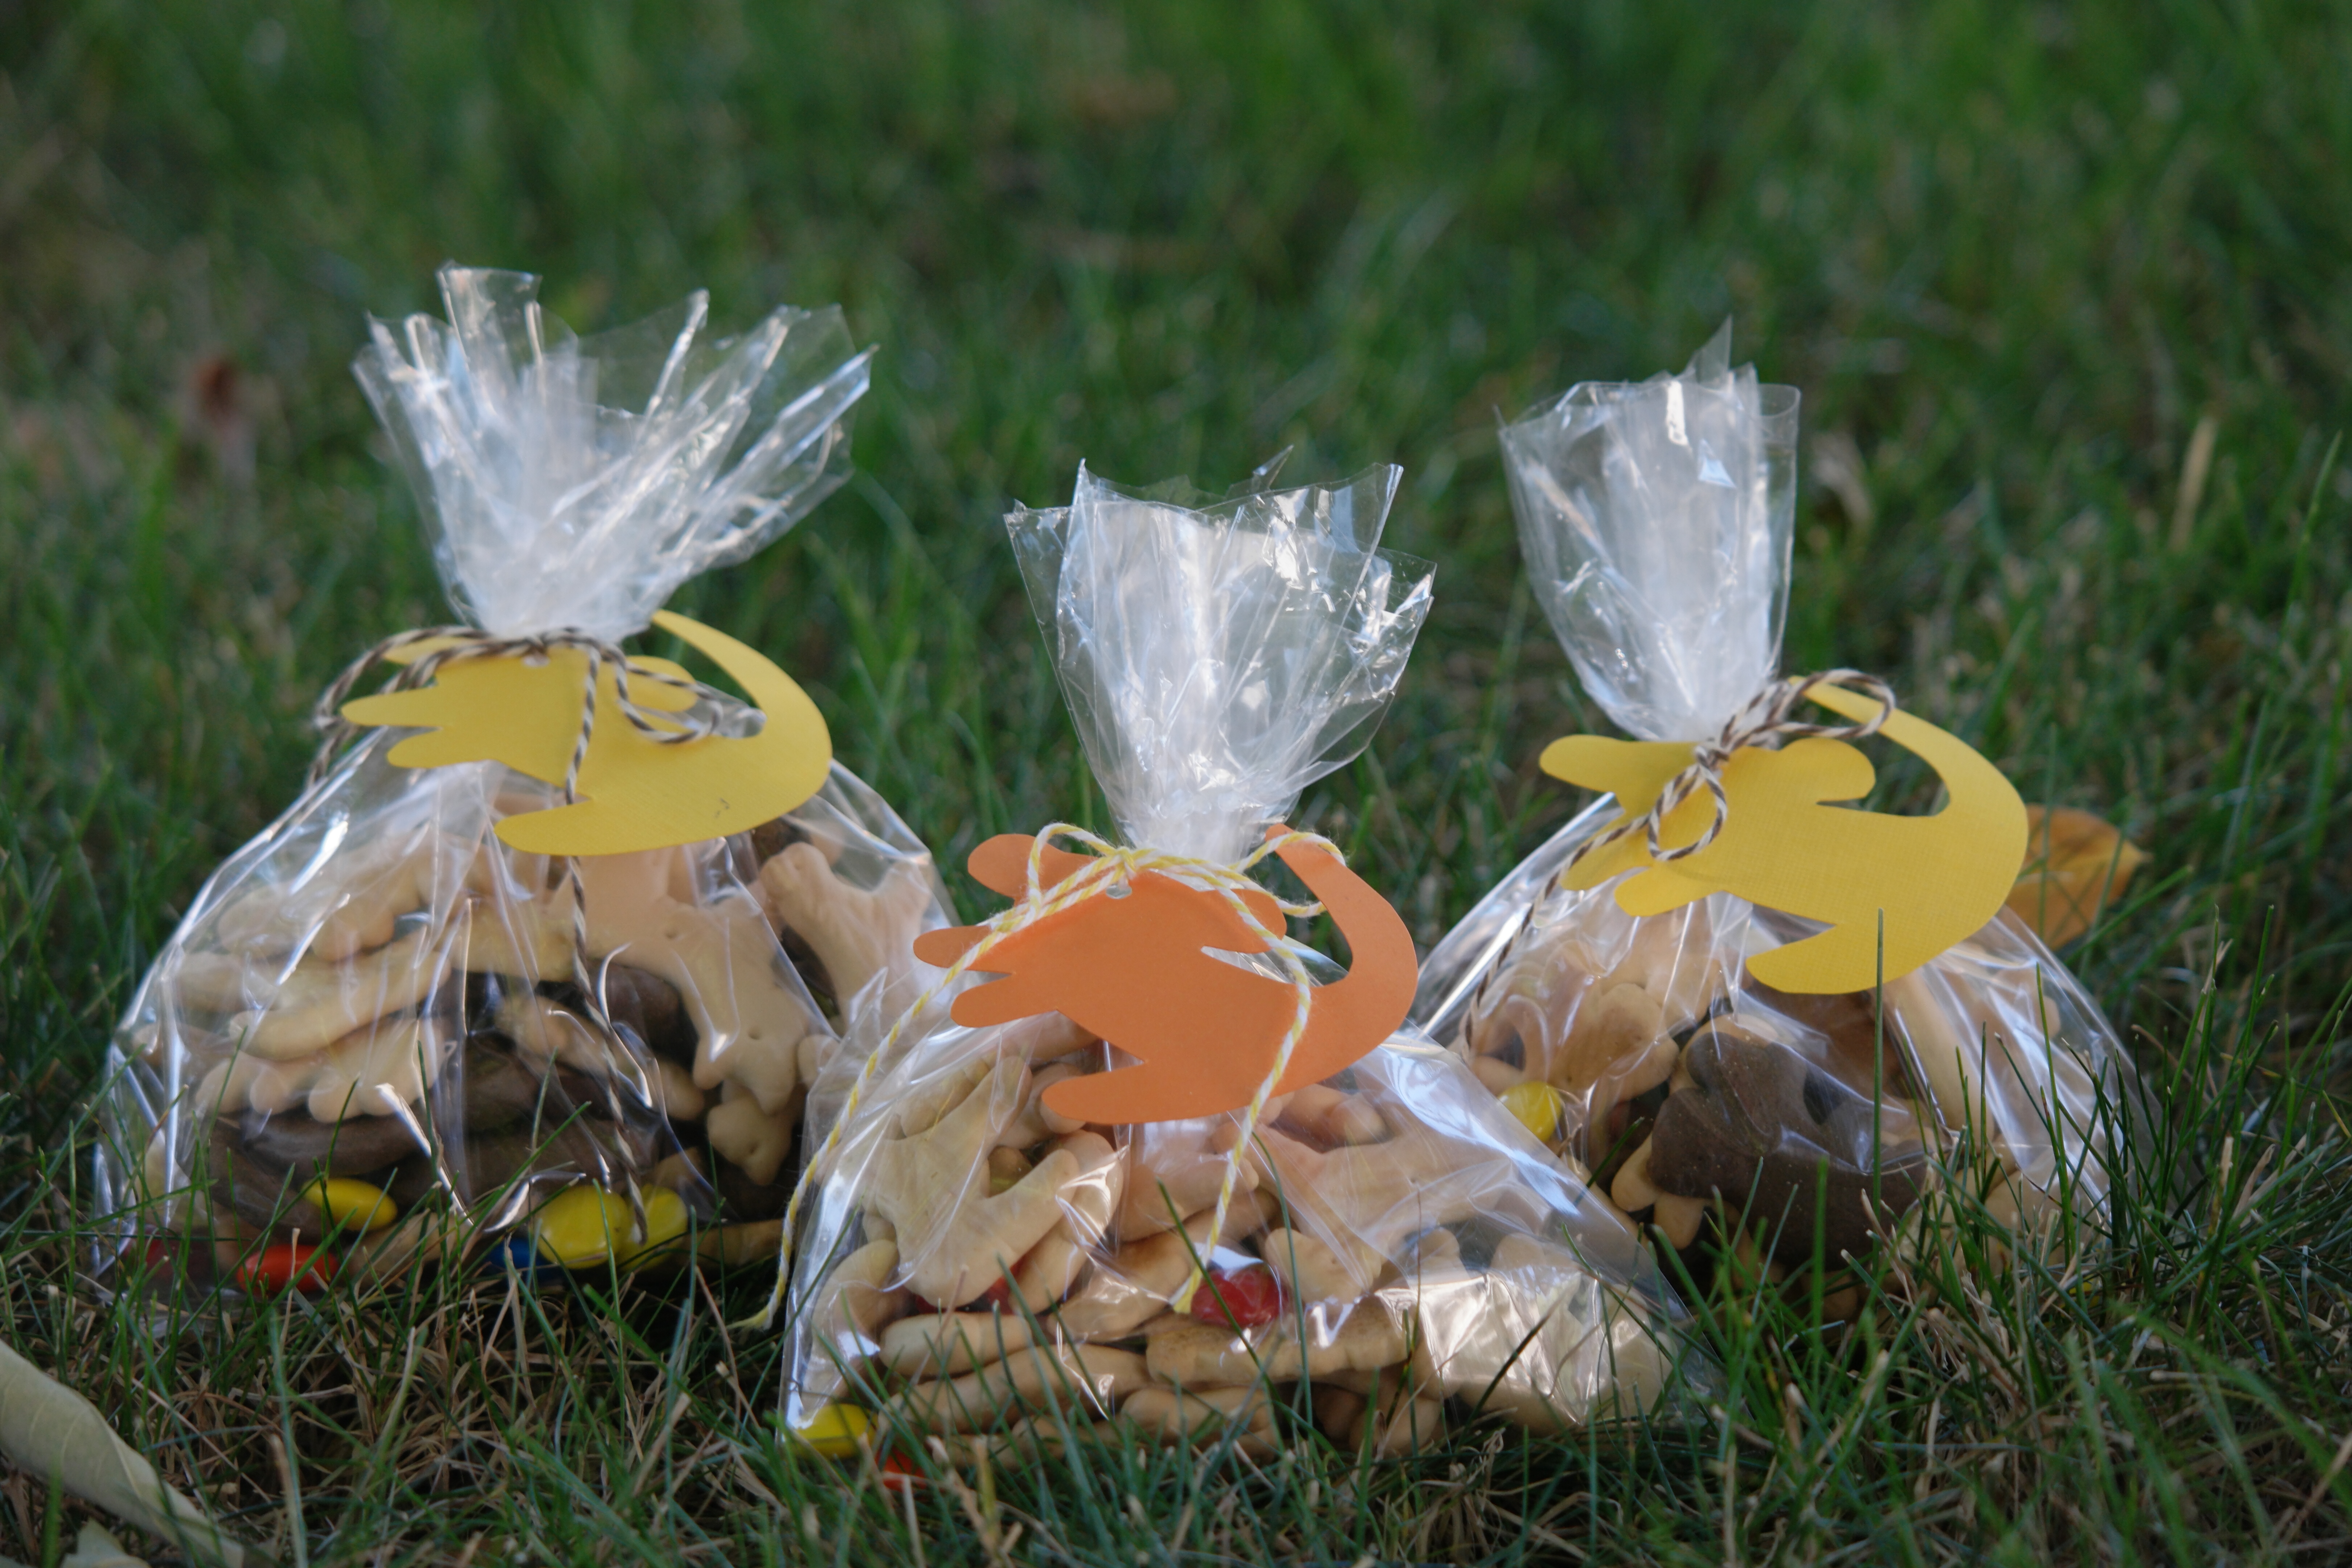
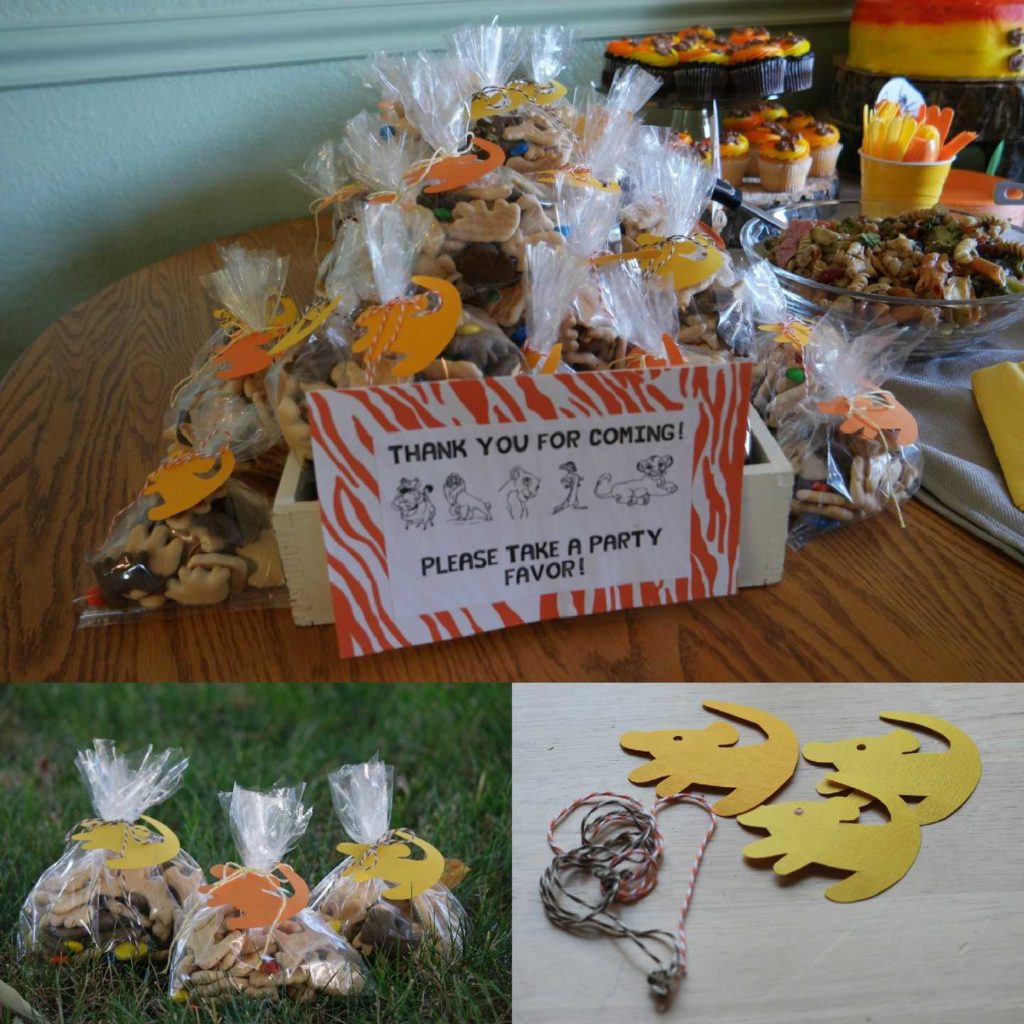
I mixed regular animal crackers with chocolate animal crackers and M&Ms. I cut the lions out of two shades of yellow and orange card stock. Of course, I used a template to make the lion embellishments and resized the image to my liking. I sealed the bags with a rubber band and used cute decorative bakers twine that was yellow, orange, and brown to tie on the Simba.
I hope I got your creative juices flowing and you are ready to start crafting your next Lion King party. Many of these ideas can be changed to whatever theme of your choosing though. And of course, make sure you have plenty of food! We did burgers, brats, Caesar salad, pasta salad, watermelon, strawberries, an assortment of veggies with homemade ranch and chips. Hakuna Matata!

Pingback:October Journaling Prompts! – Trendovy Creativity
This is so stinkin’ cute! My son will be turning 2 soon and he adores the Lion Guard but I’m not finding things I like. I figured j could search Lion King but still nothing! I love your ideas and games! Will be using some of your ideas when the time comes! Thanks!
Ohhh yay! That’s great! I know I was so shocked there wasn’t much out there for a Lion King party. I bet your little boy will love his Lion Guard party. I’d love to see some pictures of what you come up with! Please share!
OH, MY GOSH! This is such a cute idea! I love how you went through all the details of everything, it makes the planning so much easier! And Lion King – what gets better than that?!
Thanks Kayla! Loving your mommy adventures blog. Your narrative story telling of how you told your parents you are preggers is great! I’m pregnant with my second. Due in June. Havent found on your blog when you are due? I’m assuming you are still pregnant, havent had baby yet and somewhat in the early stages? Congrats! Babies are such a joy & exhausting!
I don’t quite have your DIY skills but some of this looks doable. Looks like a fun party and the decorations are amazing. Especially ❤️ the Simba painting.
Thanks! I am kind of a D.I.Y. queen. Lol oh my gosh I loved your blog post about kids sleeping through the night. I have a 19 month old boy and for the most part he sleeps through the night. What people don’t tell you is that even when your kid is sleeping sometime you’ll hear what you think is them crying but nope it’s a “phantom cry”! Baby is sound asleep afterall. Im having baby #2 in June and im def. Not looking forward to sleepless night. 😉
Wow, this is amazing! I just love that banner!!
Thanks Corey!
This is adorable! It looks like you put on a great creative party that any kid would want to go to!!!!
Thanks Sarah! Love that you crochet! I dabble into crocheting usually around winter time. There’s just something about winter that makes me wanna crochet. I still have a blanket I need to finish!
WOW, so much thought, effort and time you put into this! I am so so amazed 🙂 I love my kids but I am not creative enough and super lazy but I commend you for doing all this. Please saved this for your son to show him all the work you put into his first bday! Well done mama
Thanks! I took tons of photos and kept a lot of the homemade decorations to put in his baby book.
Wonderful article Thanks for sharing.
We stumbled over here coming from a different page and thought I might check things out. I like what I see so now i am following you. Look forward to looking at your web page for a second time.
Pingback:How to Throw a "Paw-Some" Clifford the Big Red Dog Birthday PAW-ty! - Trendovy